
This post may contain affiliate links. If you use these links to buy something we may earn a small commission. Thanks.
What is your idea of a perfectly grilled steak? If you’d like your meat tender, juicy, and rich with that delicate smoky flavor, a charcoal grill is usually the best. But before making that flavorsome meal, you’ll first need to know and understand how to use a charcoal grill right.
Sure, many people find the traditional cooker more intimidating to start and control the cooking temperature than a gas grill. But in my experience, the hardest part used to be only lighting the coals to start the fire.
However, lighting a charcoal grill is a total breeze now. And in this guide, I’ve put together everything you should know about the whole process to ensure a fun grilling session.
Start with the Right Charcoal Grill
Technically, the answer to any delicious recipe is having the right cooking tools. You need the best charcoal grill if the goal is to prepare something that everyone will love.
No, not that the equipment must be new in every grilling session. I’m just saying it should be operating properly, whereby you also have good control over the cooking heat.
If you have a relatively old charcoal grill, fix any hole in the bottom to prevent excess air from flowing into the firebox. Otherwise, you’ll end up burning your piece of steak and ruining your plans for a memorable BBQ.
The lid of your charcoal grill should also be able to hold in the heat if the idea was to slow-cook your meat until tender and juicy. Then, a lid-mounted thermometer, as we have on Primo and Kamado Joe charcoal grills, can help track the hotness of the cookbox without opening the lid. So, it might be worth replacing or readjusting in case yours isn’t functioning right.
Furthermore, remember a digital charcoal grill smoker Combo like the Masterbuilt 800 or 1050 series uses the blower fan to push the heat into the cookbox. Make sure it (and the whole electronic system) is working properly all the time.
Choose the Proper Burning Fuel
Once sure your charcoal grill will work as needed, you’ll also require to have the right coals for the cooking. It’s wise to choose early as both lump charcoal and briquettes totally differ in cooking.
- Lump charcoal:
Lump charcoal consists of pure blocks of wood prepared by burning slowly in an airtight space. The fuel is usually a little expensive to buy. But it responds well to oxygen and lights up fast while at the same time producing less ash.
You’ll also notice the flavor of the food cooked on lump charcoal is noticeably unique and better than briquettes.
- Charcoal briquettes:
Charcoal briquettes consist of sawdust that has been compressed under high pressure and temperatures in an airtight carbonization furnace/ kiln. The fuel is way more affordable to buy than lump charcoal and also tends to burn more consistently for a long time.
If you have the best brand of charcoal briquettes, your grilled food will also have a nice smoky flavor. But the flavor won’t be as intense as with the lump charcoal, plus the waste you clean after will be more.
- Charcoal lump/ briquette mix:
Charcoal lump/ briquette mix involves using both fuels to balance off the effectiveness. You get to cut the cost of your grilling fuel yet still enjoy food with a rich smoky flavor.
Step-By-Step Guide On How To Use A Charcoal Grill Right
After you’ve got the right grill and charcoal coals, everything else is pretty straightforward, even for first-timers. But gather everything you’ll need at your grilling area to avoid unnecessary movement and ensure a fast, smooth experience.
What You’ll Need:
- The charcoal grill
- Bag of charcoal lumps/ briquettes
- A Lighter (matchbox/ gas lighter)
- Fire poker
- Grill gloves
- Charcoal Chimney starter (optional)
- Firestarter cubes (optional)
- Food thermometer (optional)
What to Do:
Step 1: Light up the Charcoal for the Fire Bed
The first step to using a charcoal grill involves lighting the coals that you’ll use to make the fire bed. As was mentioned, this part used to be a hassle years back as you’d wait up to an hour before the coals light up. It would be even more intimidating on calm days (no wind) and you’d have to blow the fire manually.
Anyway, today you can light up your charcoal grill within five minutes using an electric charcoal lighter. If not, you can light the coals in a charcoal chimney with a fire starter cube (or crumbled newspaper) at the bottom.
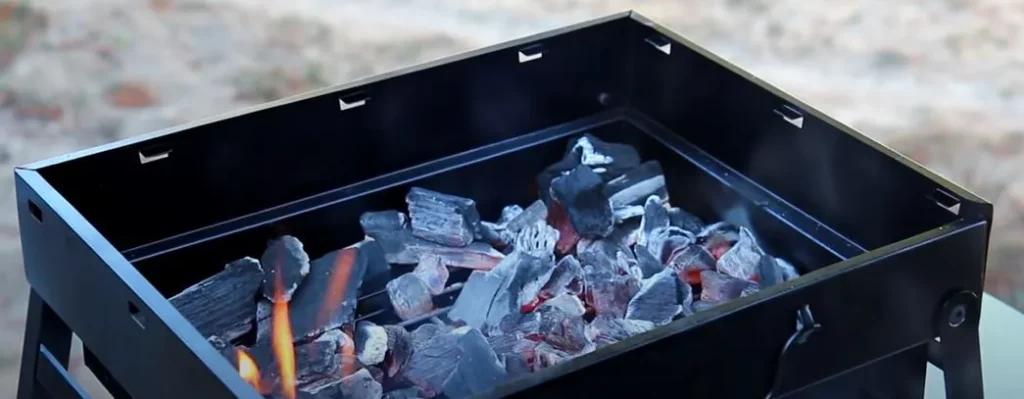
Step 2: Spread the Glowing Lump Charcoal in the Firebox
It will take roughly 15-20 minutes to burn the coals in the charcoal chimney until they’re white (hot). You can tell they have burned properly when flames appear at the top of the chimney starter. And when that happens, lift the cooking grate from the grill and gently pour the glowing coals into the firebox.
Use a fire poker to stir and spread the burning coals evenly over the charcoal grate to ensure even heat distribution. You can add more fresh charcoal from the bag if the layer is too thin to create the right heat for your cooking.
But do make sure you stir the lumps to mix the burning with the unburnt for quicker heating. Then Put back the cooking grates.
Step 3: Open up the Charcoal Grill Dampers
At this point, the dampers of your grill should be open to ensure all (or most) charcoal coals are burning before you start cooking. In a ceramic charcoal grill like the Kamado Joe or Primo I’ve mentioned earlier, you can close the top dampers/ vents. The bottom vents will be enough to carry on the combustion, which will happen at a relatively slower rate.
Step 5: Clean the Cooking Grate/s
When the cooking grids are hot, you’ll need to wipe off the surface debris before you place your food on them. A lot of people usually do this quick cleanup with a rag soaked in water. But I’d recommend soaking the rag in vegetable oil as it will clean the surface and at the same time prevent food from sticking.
Another thing, the grids will be hot here. You’ll want to wrap the rag on a stick or spatula (before soaking) to save your fingers from painful burns.
Step 4: Add Wood Chips If Desired
If desired, you can add a few wood chips to the firebox of your grill to embellish your food with a richer smoky flavor. You can go with unique varieties of food-grade wood chips- say applewood, cherrywood, hickory, mesquite, et cetera for extra unique flavors.
And for better results, soak the wood chips in water for about 15-25 minutes before dumping them on the coals.
Note: the cooking grids at this point will also be hot. So, use a grill grate lifter/ gripper to lift them without burning your fingers again.
Step 6: Wait for the Cookbox to Heat Up Well
After you’ve put the cooking grates back on the grill, close the lid until the cookbox reaches the right temperature to start grilling. Many people like to start around 300°F, which should be easy to track if your system has a lid-mounted thermometer.
If you notice the grill taking long to achieve your desired starting temperature, slide all the dampers open, including the top one. And in the event the temperature is beyond your liking, close the vents until it drops to the right range.
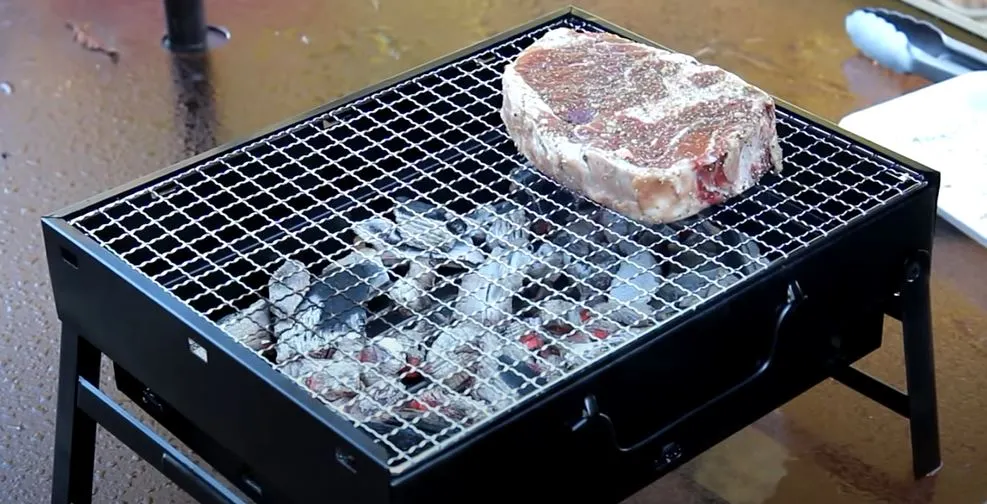
Step 7: Arrange You Food on the Clean Grate/s
Now lay your meat or any other food you’re preparing on the hot grill grates and drop the lid. You can close the top dampers (if they were open) to rely on only the bottom vents for temperature control. Then leave your food to cook.
Step 8: Watch Out for those Flare-Ups
Flare-ups can be tricky to avoid in a charcoal grill, especially where you’re cooking directly on hot coals. If preparing a fatty steak or chops and you never trimmed it (fat) away, you might want to work with your grill open. The same can be said for foods with oily marinades and sauces to avoid burning them and ruining your recipes.
Step 9: Flip the Food on Time
After your meat cooks for a few minutes, use your spatula (or tongs) to flip it for the other side to get heated.
If still new at this and haven’t familiarized yourself with the grill, you can continue to monitor and check your food more often. But remember opening the grill lid a lot will have your meals cook slower and also might lack that intense smoky flavor.
Step 10: Play with Your Grill as Needed
Unfortunately, most charcoal grills need babysitting to maintain the cooking heat to the desired level. You’ll have to be close so you can open the dampers when you need to raise the temperature or close them for a lower setting.
If the cookbox is overly hot and closing the dampers didn’t lower the temperature fast, open the lid completely.
Step 11: Confirm Your Food Is Ready
Once your food is nicely browned, draw in a thermometer to make sure the inside is also thoroughly cooked. A well-done chicken will read around 75°C, Turkey at 80°C, 70 – 75°C on pork, 70 – 78°C for beef, and so on.
If you don’t have a food thermometer, cut your piece of meat around the center and confirm it’s been properly cooked.
Step 12: Put Off the Burning Charcoal
After your food has been thoroughly cooked, remove it from the grill into a serving pan with a pair of tongs or spatula. Then shut the cover and all the air vents of the grill to stop the combustion process.
In about 1-2 hours, the grill should be cool enough to remove and dispose of the ashes.
Store Your Charcoal Grill Well
As you can see, it’s very easy to use a charcoal grill once you’ve figured out how to light it up. The temperature/ heat control stuff might be boring, for sure. But for me, I find it fun and also totally worthwhile when you know what awaits.
Speaking of worthiness, do know any Charcoal grill can work for either direct or indirect cooking. The only difference is that the larger systems will be more convenient in indirect cooking than their smaller counterparts.
Last but not least, store your charcoal grill properly if you’d like to have a smoother experience during the next grilling session. Keep the cooker under a roof or secure completely with a weather-resistant cover.
Otherwise, harsh elements like water will not only comprise the durability of the grill. But also the coals may fail to light up properly next time if the charcoal grate was damp.