
This post may contain affiliate links. If you use these links to buy something we may earn a small commission. Thanks.
Dark brown, tender, and refreshing flavor, this is how any nicely cooked ribs should be. In this recipe, though, we’ll be looking at how to cook ribs on gas grill in foil with apple juice for an even more delicate deliciousness.
You might miss the rich smoke flavor that charcoal grill usually adds to the formula. But as we mentioned the other day, it’s pretty easy to get some charcoal flavor on gas grill too. So, our ribs will still be satisfying and pleasurable.
Why Cook Ribs on Gas Grill in Foil
Technically, you can cook your set of ribs on a gas grill while wrapped in foil or on “open fire” till the end. But in either case, you shouldn’t have your food directly on the flame. It should be with indirect heat to avoid drying them out.
So, the method won’t be ideal with the likes of Weber Q1200 and Q2200 that has a single burner. It’s best with at least a 2 burner gas grill so you can light one side while the other end cooks.
If cooking on an “open fire” (with the ribs directly on the grates), your meat might not get as tender as desired. The cooking style has juices to help moisten the meat dripping to the bottom.
But if you wrap your ribs in aluminum foil (tightly), it will collect these juices and fat. Then as you grill, the liquid will create steam to tenderize your meat.
The foil wrapping will also enclose the heat to one point only: your ribs. Thus, you can expect to cook a little bit faster- half the time, to be exact.
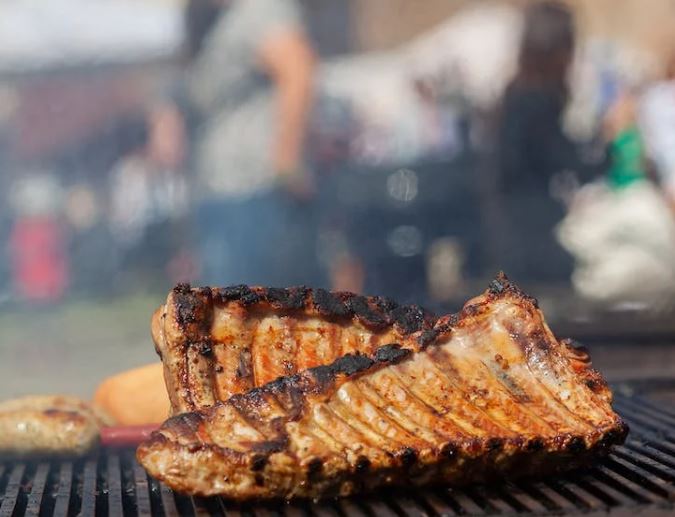
Note: your ribs will still achieve a bit of a brown coat while wrapped in the foil. It’s actually a nice touch as your food has a minimal risk of getting burnt.
Significance of Cooking Ribs on Gas Grill in Foil with Apple Juice
In some cases, the juices and fat from the ribs may not be enough to tenderize your meat. Even after wrapping it in the aluminum foil, you might need to pour some extra liquid to help generate more steam for the process.
Now, this is one of the significances of including apple juice in your recipe. A half-cup amount is usually enough for the task since your ribs still pack their own juices. And after boiling together, they create that moisture you want for tenderizing.
In addition to that, the apple juice will also embellish your ribs with an extra delicate, unique flavor. But instead of putting the juice on the foil, pour it onto the ribs. You’ll be able to feel the flavor both on the surface and inside the meat.
How To Cook Ribs On Gas Grill In Foil With Apple Juice
The instructions on how to cook ribs on gas grill in foil with apple juice are pretty straightforward even for a newbie. As mentioned earlier, the cooking method here will work with at least a two-burner grill.
But with a larger meal- which is probable in a weekend BBQ, a 4- or 5-burner gas grill will be more spacious.
What You’ll Need:
- A fresh rack of ribs
- Some nice rib rub
- Bit of BBQ sauce
- Half a cup of apple juice
- Your gas grill
- Sharp Knife
- Blunt dinner knife (optional)
- Cutting board (optional)
- Smoker box (optional)
- A couple of wood chips/ chunks
What to Do:
Before all else, gather everything you need in your grilling area. It makes the entire process easier and also saves on time that you’d be running to and from the house.
Once done with that:
Step One: Prepare the Ribs
I’m assuming you already have the rack of ribs- pick the freshest stock for the best flavor. If you’re using a stock you had stored in the freezer, take it out and let it sit on the table to defrost.
Next, grab your knife and peel off the outer membrane that runs along the bone side of the ribs. It’s very tough to a point the seasoning/ rubs, sauce, and smoke won’t get inside the meat as we’d want. Even after cooking, it’s usually still tough and chewy, which isn’t pleasurable to eat.
You can easily remove the membrane by prying it loose (preferably with a blunt dinner knife) from one end. Then grab it with a paper towel (to reduce slipperiness) and peel it off like you do packaging tape.
Tip: If the stock was very fat, it might be necessary to trim away the excess pockets of fat too to avoid ending up with greasy ribs. After all, the meat on the ribs already has its own fat to create the moistening steam.
Step Two: Season the Ribs
Once the tough membrane is out of the way, it should be easy to rub the ribs with your desired seasoning. If possible, make your own homemade rib rub using the freshest produce for a higher intensity of deliciousness. I’m sure you’ll crave digging into those ribs even when the belly is full.
Anyhow, to apply the rub on your ribs, start by mopping away the excess moisture with a paper towel. You want the ribs dry so that when you sprinkle the seasoning powder it sticks well without dripping away.
Tip: Focus your seasonings on the meat side of the ribs, but do make sure it’s still well distributed over the whole rack.
Step Three: Prepare Your Grill Smoker
Would you like to add a smoke flavor to your cooked ribs? If yes, you can proceed with this step (skip to the next step in case you don’t the smoky flavor).
It’s an easy process as you just need to soak your wood chips in water (or your preferred liquid). We shall be using them later on- not now.
Step Four: Wrap the Coat of Apple Juice
Now grab your heavy-duty aluminum foil and place your seasoned ribs on it. Each stack of ribs should be on its foil to ensure it cooks properly. If the stacks are larger than the side of the grate you’ll be cooking on (remember it’s indirect heat) cut them in half.
Next, lift the edges of the foil and pour the apple juice onto the ribs. Then fold the foil together tightly until you have an airtight seal. If possible, wrap the second layer of foil on each stack of ribs and make sure you don’t poke any holes.
Step Six: Cook the Ribs for One
Again, remember we’re cooking the ribs on indirect heat. If using a 4-burner or 5-burner cooker, place the wrapped rack of ribs at the center and turn these burners off. And for a 2-burner grill, arrange your ribs nicely on the side with the burner off too. Then close the lid and set the knobs to medium heat.
The idea is to cook the ribs at medium heat (about 300 – 375°F) for the next One (1) hour. So, it might be a great idea to have the eternal thermometer working okay to avoid opening the lid now and then.
Tip: the temperature in the cookbox will always drop whenever you open the hood of the grill. Hence, the reason you should leave your ribs to cook for the next hour without opening it (lid).
Step Seven: Apply the Nice Rib Sauce
After the one hour has passed, you can now come back to your grill and check if the ribs are done or not. If everything was done right, they sure will be done, which you can tell with the bone sticking out above the meat. When you jab a meat thermometer, the internal temperature will also read about 165°F (or about 75°C). But we’re still not done yet.
It’s time to apply some barbecue sauce to pull out that magic we have on the ribs from the Firestone Grill or Westwoods BBQ. And to do that, you only need your bowl of sauce and the basting brush.
Apply the BBQ sauce to your stack of ribs and put it back over direct medium heat (with the lid closed) for five minutes. When it (sauce) cooks into the meat, the side will start to form a crispier brown coating.
Apply a second and third layer of sauce- each time as you put your ribs back into the grill over medium heat for five minutes.
Step Eight: Add the Smoky Layer
After applying the final layer of sauce and heating for five minutes, you can remove the ribs from the grill and serve. But for an extra aromatic savor, add a couple of the wood chips we soaked earlier (in Step Three) into the smoker box. Then put it over the burner and let your ribs cook on the smoke (with the lid closed) for another 5-10 minutes.
If you wanted a richer smoky flavor, include the smoker box in the cookbox from Step Six until you serve. Just put it over either of the lit burners.
Tip: if you don’t have a smoker box, you can wrap your wood chips with aluminum foil into balls. Then poke a few holes in these balls for the smoke to escape.
Try Other Fruit Juices
In conclusion, that’s how to cook ribs on gas grill in foil with apple juice. It’s faster than smoking (cooking method) as you can have your food ready to eat in one and a half hours instead of three.
Once the ribs are done (either in saucing or smoking stage), remove them from the grill and turn off the burners. Put them on your chopping board cut and serve immediately.
If desired, you can substitute apple juice with other liquids, such as pineapple and orange juices. You can even go with beer, but that will be a topic of another day as the guidelines may vary a little bit.