This post may contain affiliate links. If you use these links to buy something we may earn a small commission. Thanks.
When people talk about legendary barbecue, brisket almost always takes center stage. This large, tough cut of beef transforms into something magical when cooked low and slow. But here’s a secret many first-timers overlook: the quality of your brisket doesn’t just depend on seasoning and smoking it starts with how you trim it.
Trimming a brisket properly ensures even cooking, maximizes flavor, and enhances presentation. Too much fat and your meat will be greasy, with flavor locked away beneath unrendered fat. Over-trim, and you risk dry, tough slices. Getting the balance right takes knowledge and practice, but once you master it, your brisket will go from good to outstanding.
In this guide, we’ll walk you through every step of trimming a brisket from understanding its anatomy to choosing the right tools, removing excess fat, and shaping it for even cooking. Whether you’re preparing for a backyard cookout or aiming for competition-level BBQ, learning how to trim brisket is a skill every pitmaster should have.

Understanding Brisket Anatomy
Before you start cutting, it’s important to know what you’re working with. A whole brisket, often called a packer brisket, is a large primal cut from the lower chest of a cow. It typically weighs anywhere between 10 and 20 pounds.
A brisket consists of two major muscles:
- The Flat (First Cut)
- Leaner with less marbling
- More uniform in shape
- Produces neat slices, great for presentation
- The Point (Second Cut)
- Thicker, fattier, and more marbled
- Juicier and more flavorful
- Often used for burnt ends
Between these two muscles is a layer of seam fat, and on the outside lies a thick fat cap. The underside often has tough, waxy deposits of deckle fat and silver skin.
Each of these fat layers requires different trimming approaches. The key is to remove what won’t render down during cooking while leaving just enough to keep the meat juicy and flavorful.
Tools You’ll Need
A good trim is only as good as the tools you use. Here’s what you’ll want on hand:
- Sharp Boning or Trimming Knife: A 6–8 inch curved boning knife is perfect for maneuvering around fat layers. The curve helps glide under fat caps and around contours.
- Large Cutting Board: Choose one with a juice groove if possible. Brisket trimming can get messy.
- Paper Towels: For blotting the brisket dry and improving your grip.
- Gloves (optional but recommended): Heat-resistant or nitrile gloves give you control and keep your hands clean.
- Kitchen Shears: Handy for trimming small, hard-to-reach fat deposits.
A sharp knife is the most important tool here. Dull knives tear meat and increase the risk of injury.
Step 1: Inspect the Brisket
Start by removing the brisket from its packaging and patting it dry with paper towels. This makes it easier to handle and less slippery.
Lay the brisket fat cap side up. Take a moment to identify:
- The flat: long and rectangular, leaner side.
- The point: thicker, irregularly shaped, with more fat.
- The fat cap: the thick layer of fat covering one side.
- Hard fat deposits: dense, waxy fat that won’t render.
Knowing the lay of the land helps you trim with confidence.
Step 2: Trim the Fat Cap
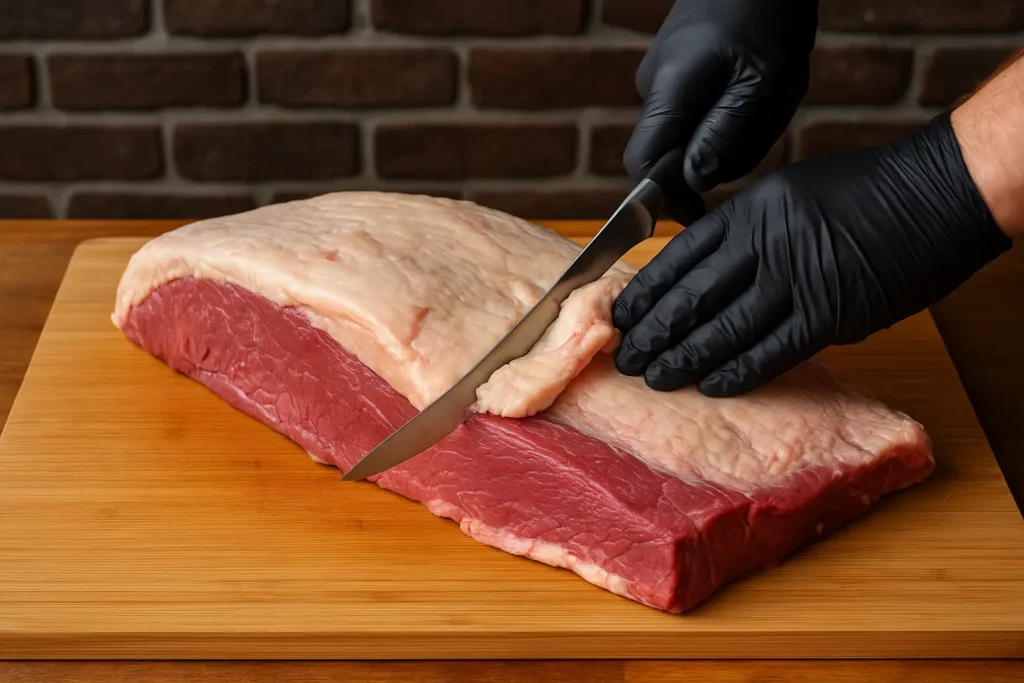
The fat cap is the thick outer layer of fat. While some fat renders and keeps the brisket moist, too much will prevent smoke and seasoning from penetrating the meat.
- Ideal Thickness: Aim for about ¼ inch of fat left on top. This creates a protective layer that bastes the brisket during cooking without being overwhelming.
- Technique: Hold your knife at a shallow angle and shave the fat off in long, smooth strokes. Avoid digging into the meat.
- Tip: Don’t stress about perfection. Consistency is more important than exact measurements.
Some people remove the fat cap entirely, but most pitmasters recommend leaving a thin layer to enhance juiciness.
Step 3: Remove the Hard Deckle Fat
Flip the brisket over to the underside. You’ll notice thick, dense fat deposits, sometimes called deckle fat.
- Why Remove It: This fat is waxy and will not render, no matter how long you cook. Leaving it on just adds weight and waste.
- How to Trim: Use your knife to carefully separate the hard fat from the muscle. Glide the blade under the fat layer, keeping as much meat intact as possible.
Removing the deckle fat also helps the brisket sit flatter on your grill or smoker, which promotes more even cooking.
Step 4: Clean Up the Underside
While you’re working on the underside, check for silver skin a thin, shiny membrane that doesn’t break down during cooking.
- Remove Silver Skin: Slip the tip of your knife under the silver skin and gently work it away from the meat.
- Trim Thin Edges: If the flat has very thin, scraggly edges, trim them off. These thin sections will dry out and burn.
- Square It Up: Clean, squared edges not only look better but also cook more evenly.
Step 5: Tackle the Seam Fat
The seam fat lies between the flat and point, where the two muscles overlap.
- Identify the Seam: Look for the natural line of fat that separates the two muscles.
- Expose It Carefully: Slide your knife gently into the seam and expose the fat pocket.
- Trim in Layers: Remove the excess fat in thin slices. Be careful not to cut too deep into the meat.
You don’t need to remove all the seam fat, but clearing out most of it helps the brisket cook more evenly and makes slicing later easier.
Step 6: Shape the Brisket
After trimming fat layers, focus on shaping the brisket. This step is about creating a uniform shape for even cooking and better presentation.
- Round the Corners: Square edges tend to burn. Trim them into rounded curves.
- Even Thickness: Remove lumpy areas that stick out. A more aerodynamic brisket cooks consistently.
- Competition vs Backyard Trim: In competitions, pitmasters obsess over symmetry and presentation. At home, focus more on even cooking and practical trimming.
The goal is a balanced brisket that looks good, cooks evenly, and slices beautifully after smoking.
Tips for Best Results
- Always Cut Away From Yourself: Safety first. Brisket is big and slippery, and trimming can get tricky.
- Work Slowly: It’s not a race. Precision trimming ensures you keep as much meat as possible while removing unwanted fat.
- Sharp Knife, Always: Dull knives are dangerous and inefficient. Keep a honing steel nearby.
- Save the Trimmings: Don’t throw fat away! Brisket trimmings can be rendered into beef tallow, ground into burgers, or used to flavor beans and chili.
Common Mistakes to Avoid
- Leaving Too Much Fat: Excess fat prevents smoke and rub from penetrating, leaving your brisket bland.
- Over-Trimming Lean Areas: Removing too much fat cap or muscle exposes brisket to drying out during cooking.
- Uneven Trimming: A lopsided brisket cooks unevenly, with one side drying out before the other is done.
- Skipping the Seam Fat: Leaving it untouched can make carving difficult later.
Conclusion
Trimming a brisket may seem intimidating, but once you understand the anatomy and learn the right techniques, it becomes second nature. A properly trimmed brisket cooks evenly, absorbs more smoke and seasoning, and slices beautifully for presentation.
Remember, trimming isn’t about achieving perfection—it’s about balance. Remove the fat that won’t render, leave enough for flavor, and shape the brisket for consistency. With practice, your trimming will get cleaner and faster, and your briskets will taste better than ever.
So the next time you unwrap that big cut of beef, take a few extra minutes to trim it right. Your smoker and your guests will thank you.
FAQs
1. Do I need to trim a brisket for the oven, or just for smoking?
Trimming is useful for both methods. Even in the oven, removing excess fat prevents greasiness and improves texture.
2. How thick should the fat cap be after trimming?
About ¼ inch. Thick enough to baste the brisket, thin enough to allow seasoning and smoke to penetrate.
3. Can I trim brisket a day ahead of cooking?
Yes. Trim, wrap tightly in plastic or butcher paper, and refrigerate. This saves time on cook day.
4. What can I do with brisket trimmings?
Render into beef tallow, grind for burgers, or use to flavor beans, stews, or chili.
5. Should I separate the point and flat before cooking?
Not usually. Keep them intact for smoking, then separate after cooking for slicing.
