This post may contain affiliate links. If you use these links to buy something we may earn a small commission. Thanks.
There’s nothing quite like a rack of pork ribs smoky, tender, juicy, and full of flavor. But ribs are also one of the trickiest cuts of meat to get just right. Unlike steaks or burgers, where doneness is easier to judge, ribs require a balance between food safety, tenderness, and texture. Undercook them, and you’re left with tough, chewy meat clinging stubbornly to the bone. Overcook them, and they turn mushy, falling apart before you can even get a clean bite.
So, how do you know when pork ribs are done? The answer isn’t just about cooking time it’s about understanding temperature, texture, and visual cues. In this guide, we’ll explore the science of rib doneness, different tests you can use, and the common mistakes to avoid. By the end, you’ll have all the tools you need to serve ribs that are consistently tender, flavorful, and perfectly cooked.
The Ideal Internal Temperature for Pork Ribs
The USDA states that pork is safe to eat once it reaches an internal temperature of 145°F (63°C), provided it rests for at least 3 minutes. However, while ribs may technically be safe at that temperature, they won’t be tender. At 145°F, the meat is still tight, chewy, and not yet broken down enough to achieve the tenderness we associate with great ribs.

Most pitmasters and BBQ enthusiasts aim for a higher internal temperature 190–203°F (88–95°C)—because this is the sweet spot where collagen and connective tissue break down into gelatin. This transformation is what makes the ribs juicy, tender, and flavorful.
Here’s a breakdown by rib type:
- Baby Back Ribs: Best pulled at 190–200°F.
- Spare Ribs/St. Louis Cut: Best pulled at 195–203°F (they have more fat and connective tissue).
The key takeaway? While ribs are technically safe at 145°F, they’re perfect at around 195–203°F.
Using a Meat Thermometer
The most reliable way to check rib doneness is with a meat thermometer. While physical tests (like the bend or twist test) are helpful, temperature is your foundation.
Best Thermometers for Ribs
- Instant-Read Thermometer: Fast and accurate for spot checks.
- Probe Thermometer: Can be left in the meat during cooking, useful for long smokes.
Where to Insert the Thermometer
Insert the probe into the thickest part of the meat between the bones, avoiding direct contact with bone, which can give false readings.
Temperature Guidelines
- Baby Back Ribs: 190–200°F
- Spare Ribs: 195–203°F
- Competition BBQ: Often pulled slightly earlier (around 190°F) for “bite-through” tenderness instead of fall-off-the-bone texture.
Visual Signs Ribs Are Done
While thermometers give you hard numbers, your eyes also tell you a lot.
- Meat Pullback: One of the clearest signs is when the meat shrinks back from the ends of the bones by about ¼ to ½ inch. This means the fat has rendered, and the meat has tightened properly.
- Color: Perfectly cooked ribs should have a deep mahogany color, often with a caramelized bark on the outside if smoked or grilled.
- Juices: Slice between the bones and check juices should run clear, not pink or red.
These visual cues complement the thermometer, giving you extra assurance.
Physical Tests for Doneness
Sometimes, the best indicators come from touch and feel. Pitmasters often rely on these traditional tests:
The Bend Test
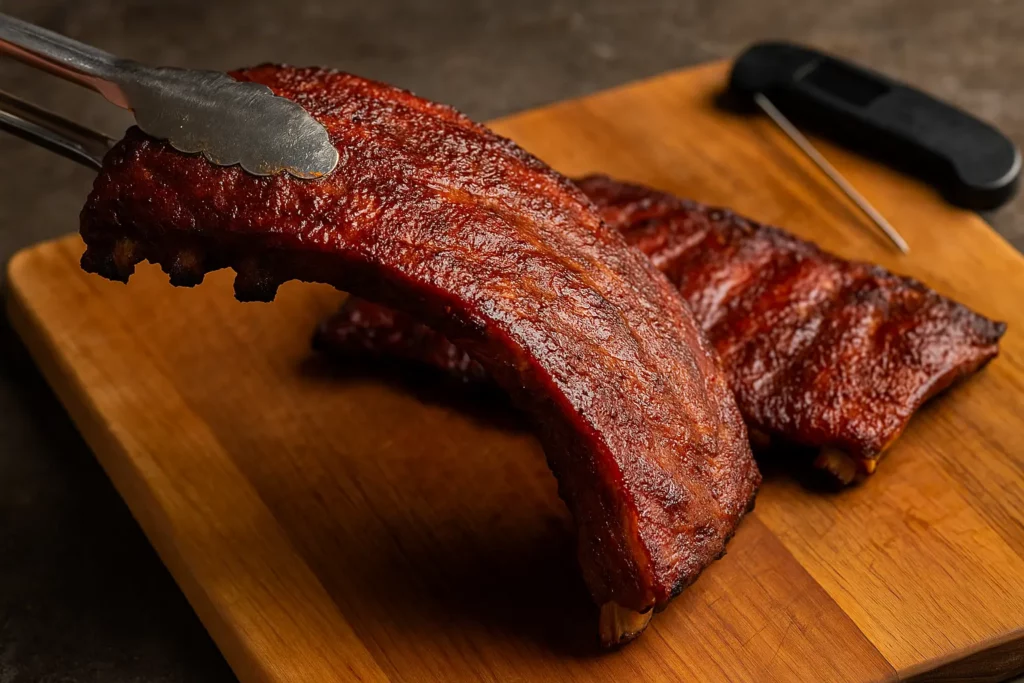
Pick up the rack of ribs with tongs about a third of the way from the end. Gently lift and let them bend. If the ribs are done, the rack should bend easily, and the surface may crack slightly. If they feel stiff, they need more time.
The Toothpick Test
Take a toothpick or skewer and insert it between the bones. If it slides in and out with little resistance like going through butter the ribs are done. If it feels tough, they need more time.
The Twist Test
Grab one of the center bones and gently twist. If the meat begins to separate and loosen easily, the ribs are ready. If it clings tightly, they need more cooking.
These physical tests give you feedback on texture and tenderness, complementing temperature readings.
Texture Goals: Tender but Not Mushy
When people think of ribs, they often picture meat “falling off the bone.” While that sounds appealing, it usually means the ribs are slightly overcooked. Properly cooked ribs should be tender enough to bite through cleanly, but still cling lightly to the bone.
- Competition Style: Ribs should be tender with a slight chew, not mushy. Judges expect bite-through ribs.
- Backyard Style: Many home cooks prefer fall-off-the-bone ribs, which are slightly overcooked but very forgiving.
Ultimately, the right texture depends on your preference, but understanding the difference helps you aim for consistency.
Cooking Methods and Doneness Cues
Smoking Low and Slow
- Cook at 225–250°F.
- Baby backs: 4–6 hours. Spare ribs: 5–7 hours.
- Look for pullback from bones, bend test success, and temp around 195–203°F.
Oven-Baked Ribs
- Bake at 300°F for 2.5–3 hours covered, then finish uncovered to caramelize.
- Use the toothpick test to check tenderness.
Grilled Ribs
- Use indirect heat for slow cooking.
- Wrap in foil (Texas crutch) after 2–3 hours to retain moisture.
- Look for deep color and pullback.
Each method impacts the appearance and feel of the ribs, so always combine thermometer checks with visual and physical tests.
Resting the Ribs
Once the ribs are cooked, let them rest for 10–15 minutes before slicing.
- Why Resting Matters: Resting allows juices to redistribute, preventing dryness.
- How to Rest: Tent ribs loosely with foil or wrap in butcher paper. Avoid sealing too tightly, which can steam and soften the bark.
This short step makes a big difference in moisture and flavor.
Common Mistakes to Avoid
- Only Relying on Cooking Time: Every rack is different. Time is just a guideline—always confirm with temperature and feel.
- Overcooking Until Mushy: While some like fall-off-the-bone, overdone ribs lose texture and flavor.
- Cutting Too Soon: Slicing immediately causes juices to run out. Always rest.
- Ignoring Rib Type: Baby backs cook faster than spare ribs don’t treat them the same.
Tips for Best Results
- Use Multiple Tests: Combine thermometer readings with the bend or toothpick test for accuracy.
- Keep Ribs Moist: Spritz with apple juice, vinegar, or water during cooking to prevent drying.
- Wrap for Tenderness: The Texas crutch (wrapping in foil) speeds cooking and tenderizes ribs.
- Practice: Each rack cooks differently. With experience, you’ll learn to trust your instincts.
Conclusion
Knowing when pork ribs are done isn’t about watching the clock it’s about mastering temperature, texture, and observation. The USDA’s 145°F guideline may ensure safety, but true BBQ lovers know ribs reach perfection between 190–203°F. Combine thermometer checks with the bend, toothpick, or twist tests, and you’ll never have to second-guess your ribs again.
Perfectly cooked ribs are tender, juicy, and packed with smoky flavor. With practice and patience, you’ll serve ribs that impress every time whether you’re cooking for family, friends, or a panel of BBQ judges.
FAQs
1. What temp should ribs be cooked to for competition BBQ?
Around 190–195°F, aiming for bite-through tenderness rather than fall-off-the-bone.
2. Can ribs be done at 145°F?
Yes, but they’ll be tough and chewy. For tender ribs, aim for 190–203°F.
3. How do you keep ribs juicy while cooking?
Cook low and slow, spritz during cooking, and consider wrapping in foil to retain moisture.
4. Should ribs fall off the bone?
Not necessarily. That usually means overcooked. Competition-style ribs should be tender but still cling lightly to the bone.
5. How long do ribs need to rest after cooking?
10–15 minutes is ideal to allow juices to redistribute before slicing.
