
This post may contain affiliate links. If you use these links to buy something we may earn a small commission. Thanks.
Seasoning cast iron is more than a maintenance task it’s a ritual for anyone serious about cooking. Whether you’re a beginner with a brand-new skillet or a seasoned pro looking to refresh a rusty pan, understanding how to season and more importantly what oil to use can dramatically affect your results.
With so many types of oil on the market, choosing the best one for seasoning cast iron can feel overwhelming. This article will break down what makes a good seasoning oil, compare top contenders, walk you through the seasoning process, and help you avoid common mistakes. By the end, you’ll have all the knowledge you need to keep your cast iron slick, rust-free, and ready to cook.
Why Seasoning Matters
Cast iron pans are prized for their heat retention, durability, and versatility. But their performance hinges on proper seasoning a layer of carbonized oil that acts as a natural nonstick coating and rust barrier.
Seasoning enhances:
- Food release (goodbye, stuck eggs)
- Flavor development (hello, seared perfection)
- Rust resistance
- Pan longevity
The key to successful seasoning lies in both technique and oil choice. Not all oils behave the same way under heat. Picking the right one sets the stage for a beautiful, glossy black surface that gets better with time.
What Does “Seasoning” a Cast Iron Pan Mean?
Seasoning is the process of applying a thin layer of oil to your cast iron pan and heating it until it breaks down (polymerizes) and bonds to the surface. This creates a hard, slick, blackened layer that protects the pan and makes cooking easier.

Unlike chemical coatings like Teflon, seasoning is natural and non-toxic. It improves over time with proper use and care. Every time you cook with fat or apply a fresh layer of oil and heat it, you’re reinforcing that protective finish.
Benefits of seasoning include:
- A nonstick cooking surface
- Resistance to rust and corrosion
- Improved heat conductivity
- A naturally dark patina that enhances with age
Qualities to Look for in a Seasoning Oil
Not every oil is suitable for seasoning. Some burn too easily, while others fail to harden properly. Here are the top qualities you want in an oil for seasoning cast iron:
1. High Smoke Point
This is the temperature at which oil starts to smoke and break down. For seasoning, you want an oil with a smoke point above 400°F to ensure proper polymerization.
2. Neutral Flavor
Oils with strong aromas can leave an unpleasant or lingering taste on your cookware. Neutral oils prevent flavor interference.
3. Good Polymerization
Polymerization is the chemical transformation from liquid oil to hard, plastic-like coating. Oils rich in polyunsaturated fats tend to polymerize more effectively.
4. Accessibility and Cost
While exotic oils may work well, affordability and availability are important for frequent seasoning and maintenance.
Top Oils for Seasoning Cast Iron
Let’s explore the best oils based on the above criteria. Each has its pros and cons, so you can choose one that fits your cooking style, budget, and goals.
1. Flaxseed Oil

- BREAKTHROUGH FORMULA FOR A STRONG POWERFUL IMMUNE SYSTEM - Our flax seed oil softgels contain...
- TOP QUALITY FORMULA, FAST RESULTS FOR BEAUTIFUL HAIR, SKIN AND NAILS - Our flaxseed oil softgels are...
- A BOLD, NEW APPROACH - Organic flax oil supports healthy digestion. It helps you feel full and...
Smoke Point: ~225°F (but polymerizes excellently)
Why It’s Great:
- Often considered the gold standard among cast iron enthusiasts.
- High in omega-3 fatty acids which polymerize into a rock-hard coating.
- Produces an incredibly smooth, shiny black finish.
Downsides:
- Expensive and harder to find.
- Can flake if too many layers are applied too quickly.
- Requires careful application and high oven temperatures.
Best For: Experienced cast iron users seeking a long-lasting finish.
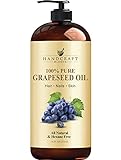
2. Grapeseed Oil
- 100% PURE & NATURAL GRAPESEED OIL is most commonly used for aromatherapy, massage and as a hair &...
- DERMATOLOGIST TESTED COLD PRESSED GRAPESEED OIL FOR SKIN has a light texture and easily absorbs into...
- LOADED WITH VITAMINS grapeseed oil is packed with vitamins A, E , and K. It is no wonder that more...
Smoke Point: ~420°F
Why It’s Great:
- Neutral flavor and widely available.
- High polyunsaturated fat content aids polymerization.
- Great balance of affordability, performance, and availability.
Downsides:
- Slightly more expensive than common oils.
- Doesn’t produce as hard of a finish as flaxseed, but more forgiving.
Best For: Home cooks who season regularly and want reliable results.
3. Canola Oil

- The information below is per-pack only
- 48 fluid ounces of Happy Belly Canola Oil. Packaging may vary
- Add versatility in your kitchen with this light tasting Canola oil
Smoke Point: ~400°F
Why It’s Great:
- Cheap and easy to find in any grocery store.
- Reasonable polymerization properties.
- Neutral taste, no scent.
Downsides:
- Can leave a sticky residue if too much is applied.
- Seasoning may not last as long as flaxseed or grapeseed.
Best For: Everyday users looking for a budget-friendly option.
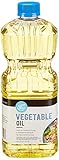
4. Vegetable Oil
- 48 fluid ounces of Happy Belly Vegetable Oil. Packaging may vary
- This light tasting oil is made from soybeans
- Great for cooking and frying
Smoke Point: ~400°F
Why It’s Great:
- Readily available and affordable.
- Suitable for beginners.
- Works well with regular upkeep.
Downsides:
- Generic blends may vary in quality.
- Might leave uneven finishes if not properly applied.
Best For: Beginners or infrequent users seasoning for general maintenance.
5. Avocado Oil

- GREAT FOR COOKING: Our refined avocado oil is the perfect all-purpose cooking oil. It is great for...
- EVERYDAY VERSATILITY: This cooking oil is useful for just about anything, making it olive oil's...
- LIGHT FLAVOR ENHANCER: This useful cooking oil has a subtle and smooth flavor compared to...
Smoke Point: ~520°F
Why It’s Great:
- Very high smoke point makes it excellent for high-heat seasoning.
- Durable and effective coating.
- Doesn’t break down easily.
Downsides:
- Expensive.
- Slight nutty flavor may linger.
Best For: High-temperature cooks or those who want premium performance.
6. Crisco (Vegetable Shortening)

- Pack of four, 48-ounce (total of 192 ounce)
- Use instead of butter or margarine for baking
- 50% Less saturated fat than butter
Smoke Point: ~360°F
Why It’s Great:
- A traditional seasoning method passed down for generations.
- Easy to apply and very forgiving.
- Creates a decent nonstick layer.
Downsides:
- Lower polymerization potential.
- Can attract dust or become sticky if not wiped properly.
Best For: Traditionalists who value ease of use over performance perfection.
7. Lard or Bacon Grease

- All the Flavor, None of the Fuss - Now there’s a convenient way to get the richer, more complex...
- Always Start with a Scoop! - With Bacon Up, you can always have bacon grease handy, so use it...
- Great for Griddles! (Cast Iron, too!) – Bacon Up is perfect to condition, clean, and cook with. It...
Smoke Point: ~370°F
Why It’s Great:
- Classic choice used for decades by generations of cooks.
- Adds great flavor to early-seasoned pans.
- Readily available for meat lovers.
Downsides:
- Animal fats can go rancid if the pan isn’t used frequently.
- May not produce a very durable seasoning layer.
Best For: Cast iron used frequently (e.g., daily breakfast pans).
Oils to Avoid When Seasoning Cast Iron
Some oils are popular in kitchens but not suitable for seasoning cast iron:
❌ Olive Oil
- Low smoke point (~375°F)
- Leaves behind a tacky or sticky residue
- Flavor can go rancid quickly
❌ Butter
- Contains water and milk solids
- Burns quickly, sticky, and ineffective for seasoning
❌ Coconut Oil
- Low to medium smoke point
- Leaves a distinct flavor
- May go rancid over time
❌ Flavored or Infused Oils
- Added ingredients can burn
- Inconsistent results and risk of residue buildup
Stick with neutral, high-smoke point oils that polymerize efficiently.
How to Season Cast Iron Step-by-Step
Follow this tried-and-true method for a perfect seasoning every time.
1. Clean the Pan
- Scrub with warm water and mild soap if it’s new or rusty.
- Use steel wool or chainmail scrubber if needed.
- Dry thoroughly.
2. Apply Oil
- Add a small amount of your chosen oil to the entire surface—inside and out.
- Use a lint-free cloth or paper towel to rub it in thoroughly.
3. Buff the Surface
- Buff off all visible oil until the surface looks dry and matte.
- Excess oil = sticky finish. Less is more.
4. Bake the Pan
- Place the pan upside down in a cold oven with foil underneath to catch drips.
- Set the oven to 450°F–500°F.
- Bake for 1 hour, then let cool inside the oven.
5. Repeat the Process
- For best results, repeat the process 3–5 times.
- More layers = better protection and performance.
Tips for Maintaining Seasoning
Once you’ve established a solid seasoning layer, you’ll want to maintain it with care.
- Avoid dish soap: Use warm water and a scrubber instead.
- Dry thoroughly: After cleaning, place on low heat to evaporate moisture.
- Re-oil lightly: Wipe with a small amount of oil after cleaning and drying.
- Cook fatty foods early: Bacon and sausages help reinforce seasoning.
- Store in a dry place: Moisture is the enemy of cast iron.
If your pan starts sticking or looks dull, simply repeat the seasoning process.
FAQs
How often should I season my cast iron pan?
You should do a full seasoning process once or twice a year, or as needed. Light re-seasoning after each use (a quick oil wipe) maintains performance.
Can I mix oils when seasoning?
It’s best to stick with one type per session for consistent polymerization. You can switch oils between seasons.
What if I used the wrong oil?
If your pan feels sticky or smells rancid, strip the seasoning with a baking soda scrub or oven cleaner, then re-season correctly.
Can I cook right after seasoning?
Yes! Once the pan is cool, it’s ready to use. In fact, cooking fatty foods helps reinforce the seasoning layer.
Conclusion
Seasoning your cast iron properly is a rewarding and essential part of ownership. It transforms a raw iron skillet into a powerful, nonstick, and rust-resistant kitchen tool that only gets better with time.
Best Oil Summary:
- For the hardest finish: Flaxseed oil
- For balance: Grapeseed or Canola oil
- For affordability: Vegetable oil or Crisco
- For classic flavor: Lard or bacon grease
No matter what oil you choose, the key is consistency and care. Season lightly, often, and correctly and your cast iron will reward you with decades of delicious meals.